
Hello! I’m Sue-Ching. You can find me @suechinglascelles. I’m really excited to be sharing with you here on the Friday Pattern Company Blog. In this blog post I am talking about the Heather Blazer and how I hack it to make a hooded coat version, keep reading to find out more.
I am a textile and soft sculpture artist and grew up watching my mum sew clothes for us. So although I know my way around a sewing machine, I never knew how to read a pattern. I only started sewing with patterns during lockdown. My first ever was the Wilder Gown, followed by the Ilford Jacket - I’m so glad I started out with those, because they made it easy to enjoy sewing! Now, my house is full of fabric and sewing is all that I think about. Who else can relate?

When the Heather Blazer was released recently, I couldn’t wait to sew it – with a few hacks of course! For my version, I wanted to make a zip up front and add a giant, cozy hood. I guess you could say that this version definitely has a more streetwear feel and will be an easy jacket to throw on anytime.
I used Liberty denim but any canvas type fabric would work, and you’ll also need to pick yourself up a jacket zip (min 20” open ended type).
I’ll step you through how I made it:
*Firstly, as my jacket isn’t lined, I omitted all of the lining pattern pieces, except for the back yoke lining. I also kept the front facing – this helps to install the zip.*

1. Follow the steps for sewing and attaching the pockets. I moved the pocket position up as I wanted to turn the hem 3”, so I moved them a to be 5” from the bottom. Join the fronts to the backs at the shoulders. From here is where things get interesting!
2. Time to assemble the hood! I used a vintage pattern for mine but if you have one in your stash, that will do. Otherwise, it would be simple to draft one. I wanted mine to be self-lined so I cut 2 hoods and sewed them together leaving the bottom open. Put the hood to one side, we will be attaching it soon.
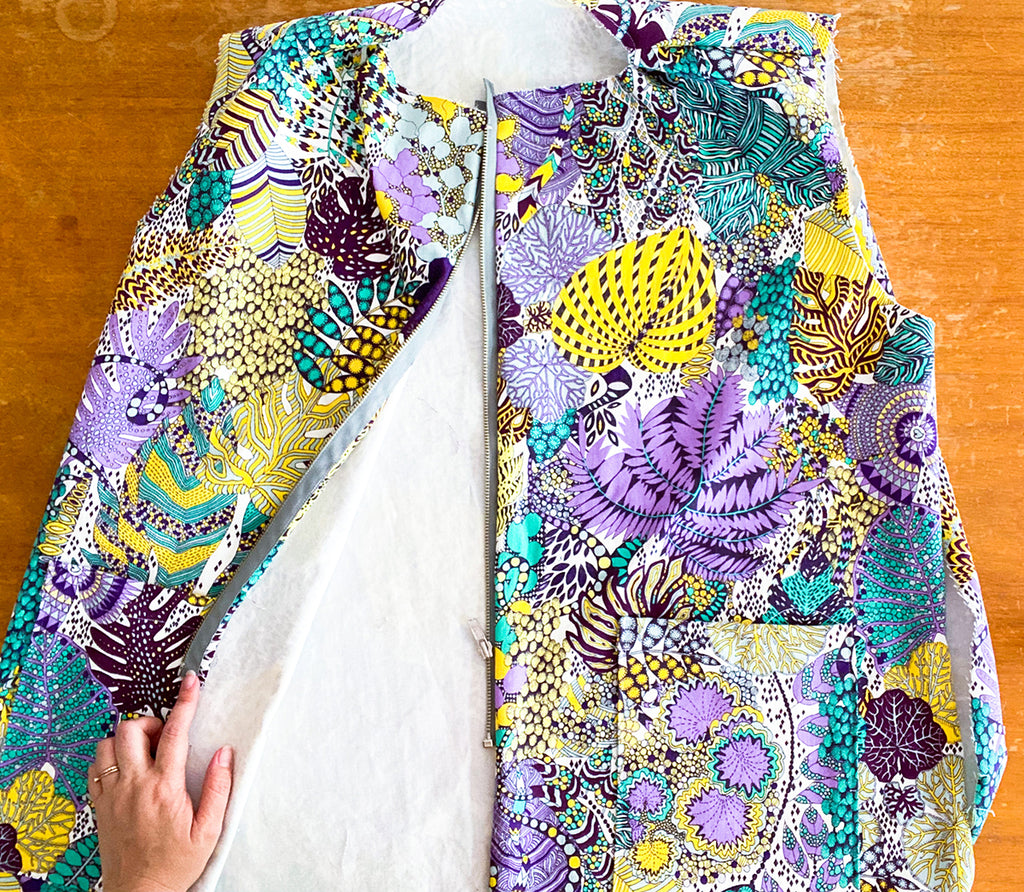
3. Now for the zip – it was surprisingly easy to put in. Mainly because it is an open-ended zipper. I used a metal 20”. Detach the zipper from each other and lie it right face down on the right side of the jacket front and baste. Put that to one side.
4. Prepare the facings by finishing the outside edge of your front facing and join them to the back facing at the shoulder. So you should have one big facing.

5. Baste your hood to the neck opening matching centres.

6. Pin the facing piece, right side down over the hood. Pin it along the neckline and all the way down the front, over the zip. Stitch the neckline and switch to a zipper foot to finish sewing the front facing. I turned up my hem at this point to stitch. Then sew side seams.

7. You’re almost there! Sew the sleeves according the instructions and attach to the body.

8. Slipstitch back facing and sew hem and you’re done. I used bias binding to finish my side seams for a neater finish.


Woohoo!! This jacket will be a great trans-seasonal or layering piece. It’s going to get lots of wear. I just know it.
Sue-Ching xx
•
Shop the Heather Blazer patterns here, and check out the lovely Sue-Ching on Instagram.


Leave a comment
This site is protected by reCAPTCHA and the Google Privacy Policy and Terms of Service apply.