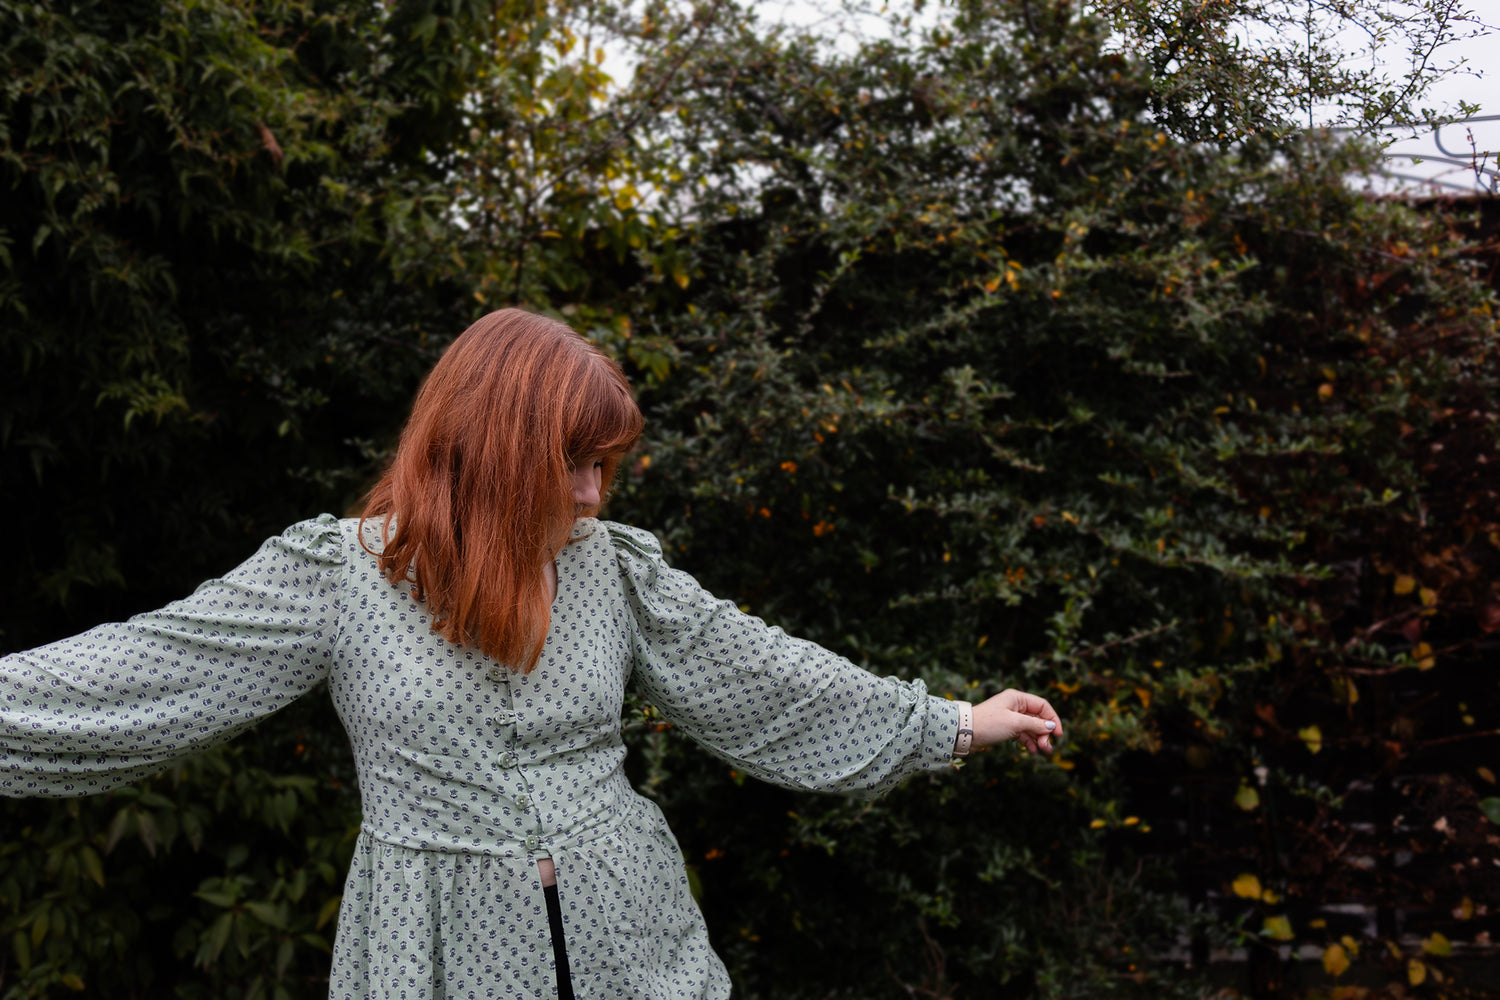
I've been dreaming up this top for a while now, and when I got this sage green fabric from Rainbow Fabrics, I knew it would perfectly for a Hughes Dress Top Hack, merged with Patina Blouse Sleeves. In this blog post I am sharing how I created the Hughes Dress into a cute cottage core top, merging in the long Patina sleeve, and adding a front button placket with looped button hooks. It's such a beautiful timeless make, that takes a little extra time but the result is something to treasure. Continue reading to find out more.
Inspiration:

Pattern Modifications:
To make the the Hughes Dress as a top, it's really simple to omit some pieces, and add on others.
1. From the Hughes Dress you will need the following pieces: A, B, D, C (all the upper top pieces), and also K, and L for the back corset ties.
2. For the sleeves I cut out piece D and G from the Patina Blouse Pattern, the long sleeve, with placket, and cuff.
3. The additional patterns pieces you need to self draft are the bottom peplum layer for the top, which is a simple rectangle 1.5 times the measurement of the hughes top waist (check finished garment measurements), then add on 1cm to see short side seam. The length is however long you want it, I went with the length to sit below my hip bone.
4. For the front of the top, in order to create a cute button loop, you also need a placket for one side of the top, to act as a modesty layer. It also gives more support to the centre front so that it sits nice and flat. This measures 2 inches (plus 1 cm each side for seam allowance), and the height of this piece is the same as your centre front A piece.
5. You also need to create a long piece to create the button loops, mine was roughly 1 inch by 50cm, this is made in the same way the back corset tie is made so we will be using the same technique.


What you need:
- For this project you need about 1.5 meters of outer fabric, and between 0.5-1 meter of lining depending on your size.
- You also need 8 buttons, 6 for the top, and 2 for the sleeve cuffs.
- As per the instructions of both the Hughes and Patina you will also need iron on interfacing, and your usual sewing equipment.
Let's make a cute top!
STEPS:

1. The main outer pieces for the top, are sewn together in the same way as the Hughes instructions. Sew in the back loops, and back and front pieces as per usual, and stop before it moves onto the skirt/lining pieces.

2. The Patina sleeves are sewn the same as the instructions permits, the only difference when it comes to dewing it into the Hughes top is that the notches won't be the same. In order to merge 2 pieces of differen't patterns together is to mark with a pen or pins roughly when you will want the sleeve head/gathered section to start and finish. I used my own reference points to pin in the sleeve, and gathered in the top of the sleeve as usual. The sleeves fit in really well to the Hughes Top, with no issues at all!


3. Interface the wrong side of your front button placket piece. With RST fold the front button placket piece you made, and sew with a 1cm seam allowance, the short end on one side. Turn it the right way out and press folded. I photographed 2 but you only need one.
4. Pin the raw un-folded edge to the centerfront of one side of your top (I pinned to wearers right, but just personal preference) with the sewn edge at the top 1cm down from the neckline to allow room for the lining. sew down center front with a 1cm seam allowance, finish seam, and press towards the bodice.

5. Press the centre front of both sides of the lining in 1cm towards the wrong side. Sew the bodice lining to the main outer bodice around the neckline, press the seam allowance towards the lining and under stitch.

6. Sew together the button loops, in the same way you sewd the corset tie at the back. Fold it in half wrong side together, then fold in the sides towards the fold, fold in again and top stitch - start off with a bit of paper or post-it note so the machine doesn't suck in the small end of it!

7. Cut it into 6 small loops - I measured mine around the button, and added 1/2 inch.


8. Use a ruler or button ruler like I have, and mark on 6 evenly spaced points, where you want your buttons and loops to be. fold your button loops and clip them to the centre front as show in the photo. I also added a bit of interfacing to the back of my centre front on the WS, so add extra strength. Sew them in place just below a 1cm seam allowance, this is to baste them on before the next step.
9. fold in the short ends of your skirt peplim panel twice 1cm, then another 1cm, and stitch. Add gathering stitches to the top of your top peplum panel, and attach it to the outer front top, right sides together, by pulling on the gathers to evenly distribute them. the sewn sides of the peplum start 1cm in from the centre front to allow space for the lining. Press seam up towards the top, as this get's enclosed in the the lining.

10. Now, right sides together of lining and outer centre fronts, pin the lining in place, sandwiching in the button loops. The bottom hem of the lining should also be pressed up 0.5cm. Stitch 1cm down the centre front on the button loops side, and the other side, leaving the hem of the lining/outer top open.
Clip corners, and turn right side out. You should have only the neckline, and centre front of the lining sewn to the outer.

11. Now the next step is up to you how you sew, either by hand or by stitching in the ditch. The folded edge of your lining get's pinned to the waist seam, with the seam allowance of the peplum encased inside. Pin fron the front side of your garment, and then stitch down the lining by stitching in the ditch of the seam from the front.
12. Repeat this process with the sleeve seam allowance, encasing it inside the lining. I sewed this step by hand because it's a bit fiddly, and meant I could be more accurate. Also I sewed the lining to the seam allowance so that you can't see it from the front. We have this step included in the Hughes Dress instructions, and our sew along if you're unsure how to hand stitch.
13. Sew on your buttons to the centre front, and sleeve placket.


That's it! You have an adorable new top. I hope you love it.
Shop the Hughes Dress Pattern here
Shop the Patina Blouse Pattern here


Leave a comment
This site is protected by reCAPTCHA and the Google Privacy Policy and Terms of Service apply.