We're seeing lots of beautiful tie front shirts and blouses online and love the style. We wanted to share how you can modify the Donny Shirt pattern to create a tie-up front version. It's a lovely project if you want to try out the bow trend, and create something with a little added interest. Continue reading to find out more.
Inspiration:
Before getting started with the project, take a look at the below examples we are loving! There are lots of these beautiful front tie-up tops by designers, highstreets, and other amazing sewists, so we wanted in on the tie-up action. The Donny Shirt is a great pattern for this because of it's boxy shape, and fuss-free construction. The pattern modifications needed aren't too complicated either so you could give this a go even if you're a beginner.

Pattern Modifications:


- Front A: Crop the length by 4 inches, this was personal preference to get a cropped length, I maintained the curved edge.
- Front Facing B: Add on the excess to the bottom of the facing, on front A measure the circle point to your new cropped hem, and use that measurement as reference for how much to add onto your front facing B.
- Back D: Same as front A, crop to desired length.
- All other pieces the same expect we are omitting the pocket, feel free to add this still if you wish.

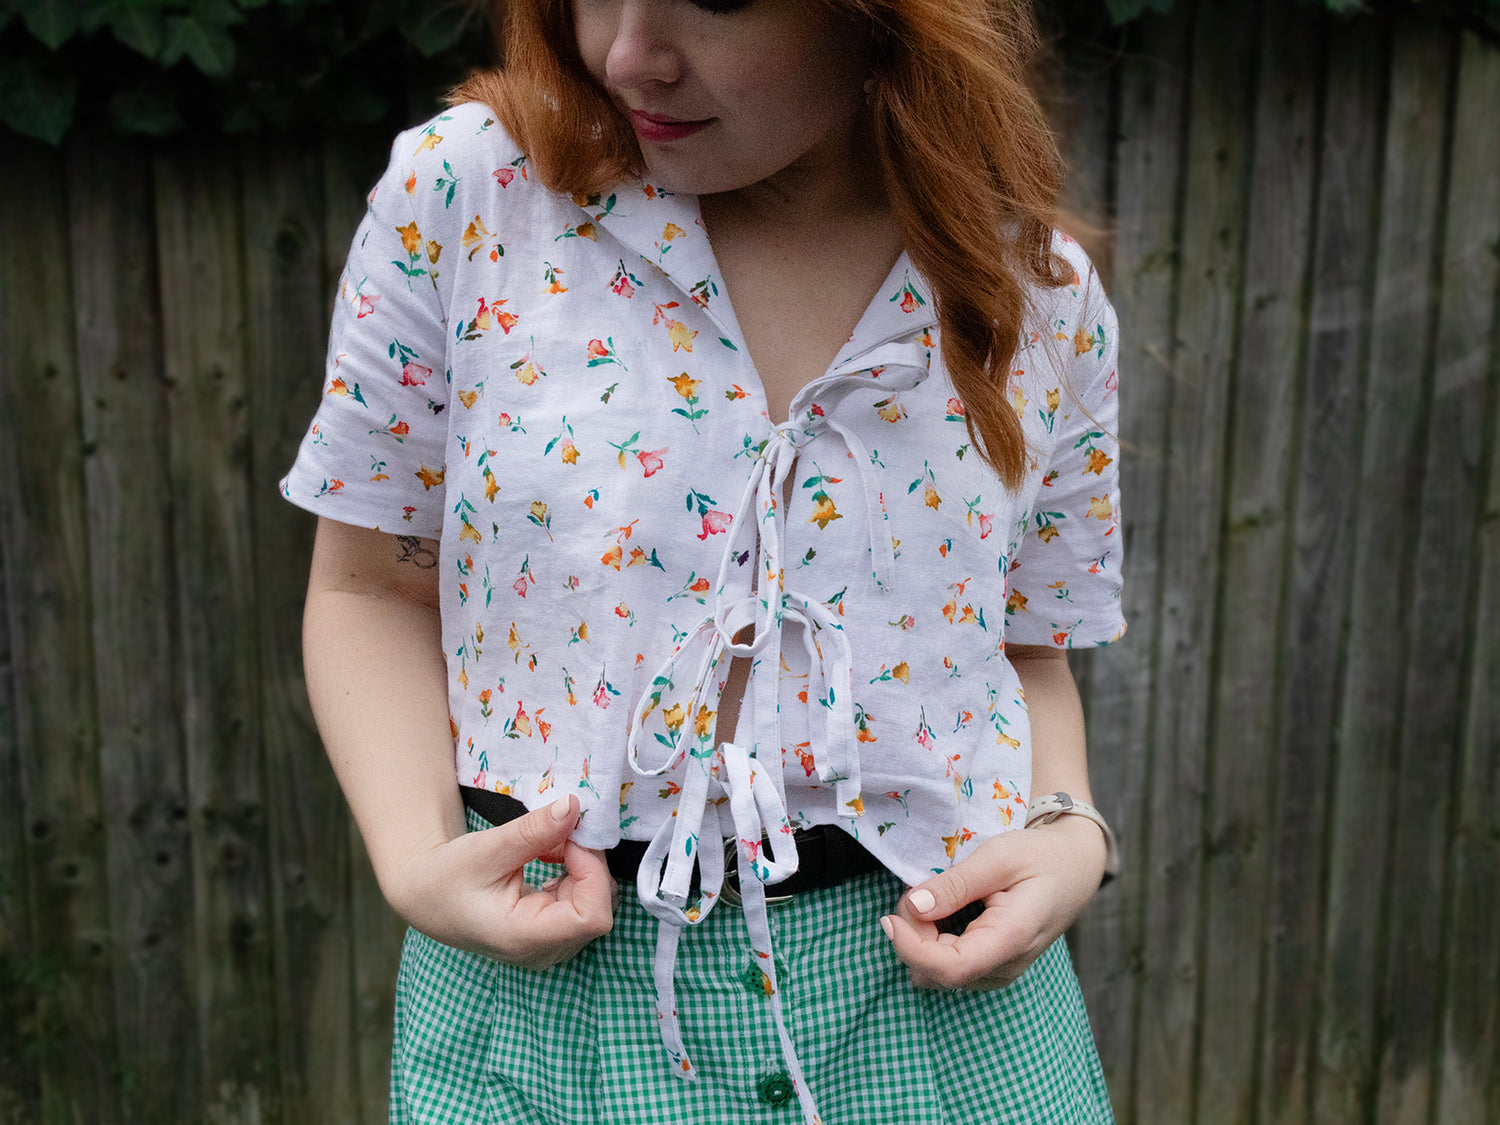
- Create 6 ties for the front (3 on each side) with measure 4cm X 30cm(roughly) although you can change the length depending on the desired size. The bows can be chunky like this version (which makes the front join sit slightly away from each other) which shows off a little skin, or make them thinner for a closer together front.
Sewing:


1. To make the ties I folded them down the centre lengthwise and pressed. I then folded the sides into the centre and pressed, then folded again and pressed, so that the sides are enclosed. Top stitch the short edge, and down the side on all 6 ties. *Little tip* use a post-it note or piece of paper when you start sewing the small edge to prevent it from being sucked into the bobbin area of your sewing machine.

2. Sew the Donny shirt collar, and shoulder seams as per the instructions, and then before moving onto the facing you want to mark on the front piece A where you want the ties to go. Mine are roughly 3 inches apart.
3. Baste the ties in place on the front A piece


4. Sew together the front facing and back yoke as per the instructions, and then pre-press the facing edge as per the instructions all the way down.
5. Pin the facing to the front A piece, and sew all the way around (omitting the circle point in the instructions).
6. Flip the facing to the right side, press, and then pin in place and top stitch it around the edges.
7. Finish the rest of the shirt as per the instructions.


That's it! Super quick and easy to make! It's perfect styled with the Bernadette Skirt (like photographed) or jeans for a more casual look. Make sure to share your version if you make it yourself, and tag us on social media @fridaypatterncompany #DonnyShirt


Leave a comment
This site is protected by reCAPTCHA and the Google Privacy Policy and Terms of Service apply.